When it comes to structured cabling and fiber-optic networks, durability and reliability are essential. Vertical Cable’s 253-SMB67 Series IP-rated surface-mount boxes provide an effective solution for protecting network terminations in industrial and outdoor environments. With IP66/IP67 water and dust resistance, IK07 impact protection, and flame-retardant ABS UL 94 V-0 construction, these enclosures are built to withstand even the toughest conditions.
Why Choose the 253-SMB67 Series?
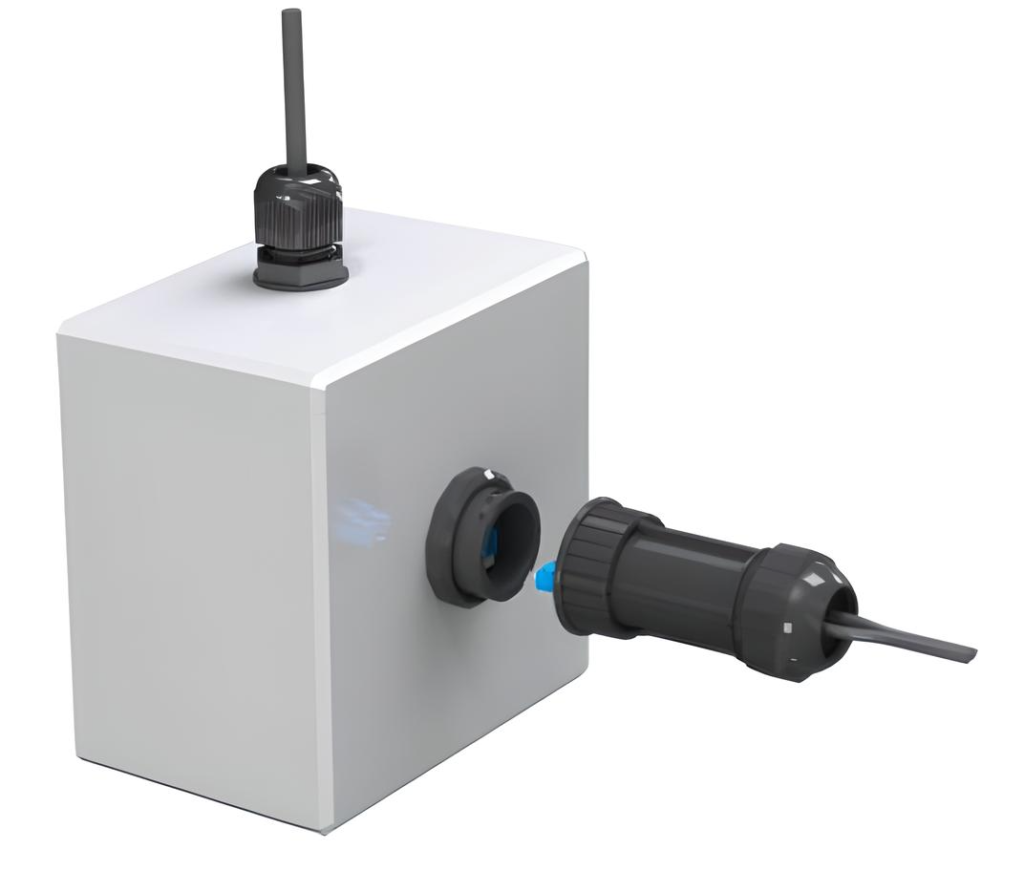
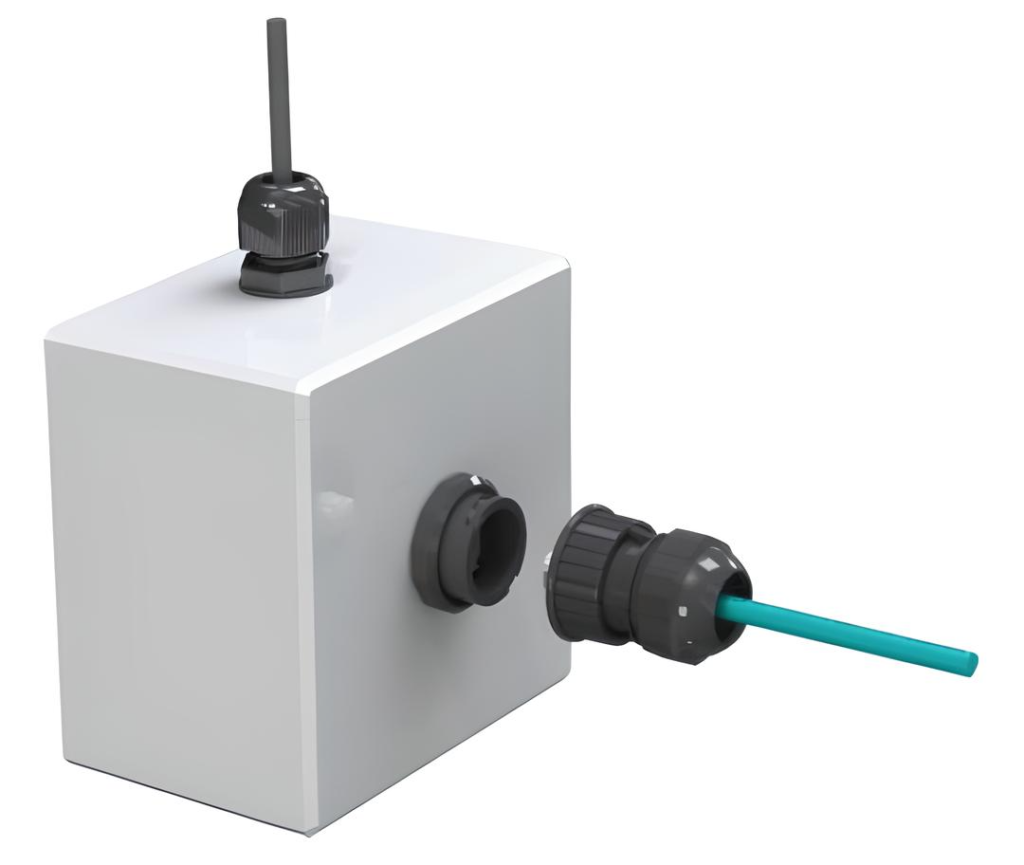
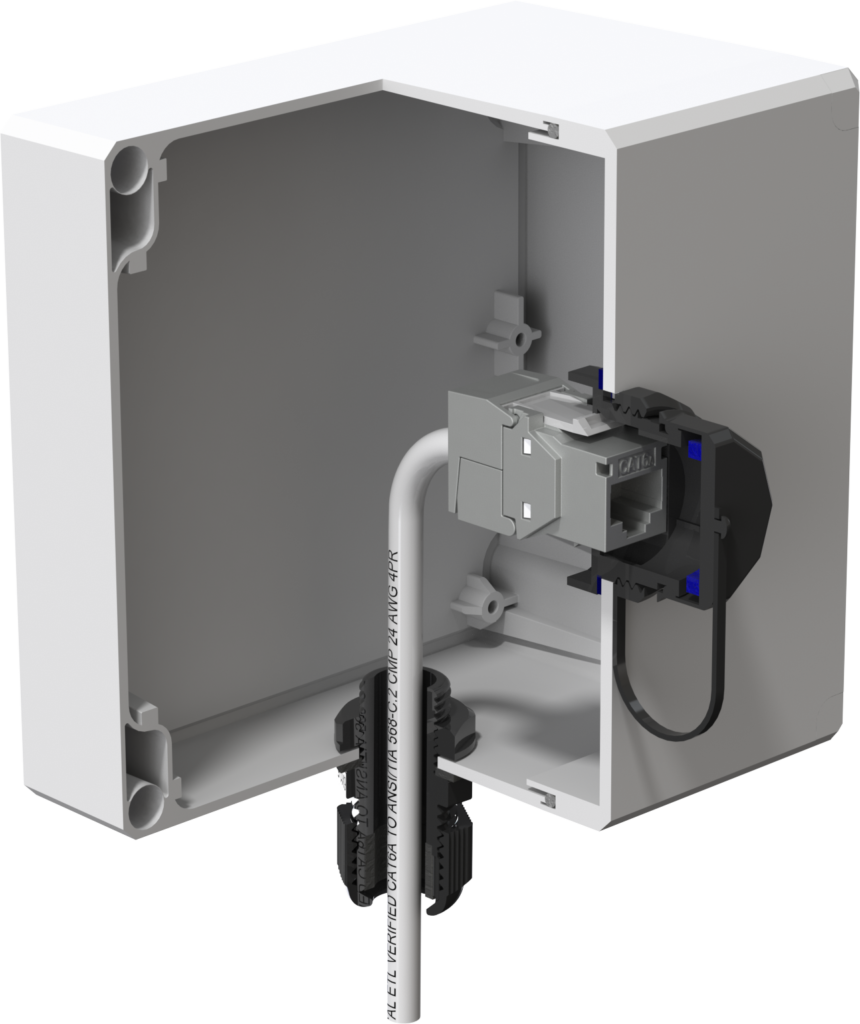
Whether you’re installing structured cabling or fiber-optic networks, having the right enclosure ensures longevity and performance. The Vertical Cable SMB67 Series is designed for twisted-pair and fiber-optic terminations, supporting various cable configurations with IP68-rated cable glands to enhance protection.
✅IP-Rated Protection – Safeguard terminations from water, dust, and mechanical impacts.
✅ Versatile Configurations – Choose from multiple models to match installation needs.
✅ Structured Cabling & Fiber-Ready – Compatible with 250-IOM68 Outlet Modules for Category 6A, Category 6, and fiber-optic cables.
✅ Durable Build – Crafted from high-quality, flame-retardant ABS plastic for industrial-grade protection.
Comparing the 253-SMB67 Models
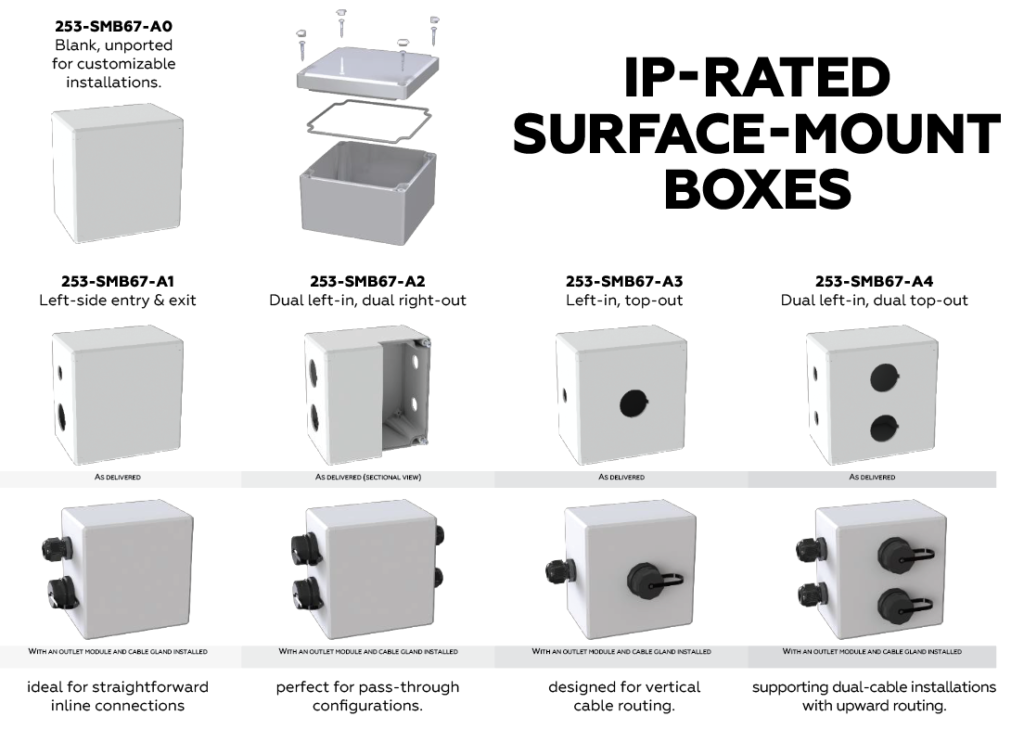
Each model in the SMB67 series is engineered to meet specific network demands:
-
- 253-SMB67-A0 – Blank, unported for customizable installations.
-
- 253-SMB67-A1 – Left-side entry & exit, ideal for straightforward inline connections.
-
- 253-SMB67-A2 – Dual left-in, dual right-out, perfect for pass-through configurations.
-
- 253-SMB67-A3 – Left-in, top-out, designed for vertical cable routing.
-
- 253-SMB67-A4 – Dual left-in, dual top-out, supporting dual-cable installations with upward routing.
Product Comparison Table:
| Model | Cable Entries | Cable Exits | Best Use Case |
| 253-SMB67-A0 | None (Blank) | None (Blank) | Customizable, fully enclosed setup No pre-drilled ports or openings |
| 253-SMB67-A1 | 1 Left-Side Entry | 1 Left-Side Exit | Simple inline connection (same-side entry/exit) |
| 253-SMB67-A2 | 2 Left-Side Entries | 2 Right-Side Exits | Pass-through connection (left-in, right-out) |
| 253-SMB67-A3 | 1 Left-Side Entry | 1 Top-Side Exit | Single-line upward routing |
| 253-SMB67-A4 | 2 Left-Side Entries | 2 Top-Side Exits | Dual-cable upward routing |
Key Takeaways:
A0 (Blank, Unported) → Ideal for custom installations, allowing the user to define entry/exit points. A1 (Single-Side Entry/Exit) → Best for straightforward inline connections. A2 (Left-In, Right-Out Pass-Through) → Perfect for structured cabling setups where cables need to be routed in a straight-through configuration. A3 (Left-In, Top-Out) → Great for applications requiring vertical routing. A4 (Dual Entry, Dual Top-Exit) → Supports dual-cable runs with upward routing.
Examples of Use in Commercial and Residential Applications
Commercial Applications:
-
- Industrial Facilities & Manufacturing Plants – Secure network terminations in environments where dust, moisture, and vibrations are common.
-
- Outdoor Security Systems – Protect PoE (Power over Ethernet) cameras and access control wiring from environmental exposure.
-
- Smart Buildings & Data Centers – Ensure high-performance network connections with reliable enclosures.
-
- Telecommunications & Fiber Networks – Organize fiber splice trays and terminations in protected enclosures for long-term durability.
-
- Retail & Office Spaces – Safeguard structured cabling and keystone jack terminations for efficient network performance.
Residential Applications:
-
- Home Automation & Smart Homes – Protect structured cabling for Wi-Fi access points, security cameras, and home networking systems.
-
- Outdoor Entertainment Systems – Secure connections for landscape lighting, outdoor speakers, and TV enclosures.
-
- Garage & Workshop Installations – Protect network wiring in locations where dust, debris, or moisture might be an issue.
-
- Home Security & Surveillance – House network connections for PoE cameras and intercom systems in weatherproof enclosures.
Perfect for Harsh Environments
From industrial facilities to outdoor security installations, the SMB67 Series is a must-have solution for installers looking for reliable structured cabling enclosures. These enclosures excel in manufacturing plants, smart buildings, and telecommunication networks, ensuring your RJ45 terminations, fiber splices, and keystone jacks are well protected.
Enhance your structured cabling and fiber-optic installations with Vertical Cable’s IP-rated surface-mount solutions. Browse our SMB67 product line and discover why network installers trust Vertical Cable for their connectivity needs.
For more insights into structured wiring best practices, check out Wikipedia’s guide to structured cabling and explore how Vertical Cable is leading the way in network infrastructure.
Vertical Cable – Your Trusted Partner in Network Infrastructure Solutions
Since the 253-SMB67-A0 is a blank, unported enclosure, you’ll need to manually drill openings for your specific cable entry and exit points. Here’s a step-by-step guide to drilling clean, precise openings without damaging the enclosure.
Tools & Materials Needed
✅ Hole Saw or Step Drill Bit (for precise, round openings)
✅ Drill (cordless or corded)
✅ Deburring Tool or Utility Knife (to smooth out edges)
✅ Marking Tool (Pencil or Marker) (to plan your cut)
✅ Measuring Tape or Calipers (to ensure accuracy)
✅ Rubber Grommets or Cable Glands (for sealing the openings)
Step-by-Step Guide
1. Plan Your Openings
-
- Determine where the cable will enter and exit.
-
- Mark the entry and exit points using a pencil or marker.
-
- Ensure proper clearance so cables are not stressed or bent awkwardly.
2. Choose the Right Drill Bit
-
- For Small Openings (Up to 1/2”): Use a step drill bit.
-
- For Larger Openings (Over 1/2”): Use a hole saw that matches your cable gland or conduit diameter.
3. Secure the Enclosure
-
- Place the 253-SMB67-A0 on a flat, stable surface.
-
- Use clamps or a vise (if needed) to prevent movement while drilling.
4. Drill the Holes
-
- Start with a pilot hole (using a small drill bit) at the center of your marked spot.
-
- Gradually increase the hole size using a step drill bit or hole saw.
-
- Drill slowly and steadily to avoid cracking the ABS plastic.
5. Deburr & Smooth the Edges
-
- Use a deburring tool, sandpaper, or a utility knife to remove rough edges.
-
- This prevents cable damage when passing wires through the opening.
6. Install Cable Glands or Grommets
-
- If using IP-rated glands, screw them into place for a watertight seal.
-
- For non-waterproof setups, use rubber grommets to protect cables from sharp edges.
7. Test Fit Your Cables
-
- Insert cables through the openings to ensure a snug and secure fit.
-
- Adjust as needed before finalizing your installation.
Pro Tips
🔹 Use a hole saw with a fine-tooth blade for clean cuts.
🔹 Drill at a moderate speed to avoid melting or cracking the plastic.
🔹 Consider conduit fittings if running multiple cables.
🔹 For IP-rated installations, use cable glands that match the enclosure’s protection level (IP68).
🔹 Once drilled and prepped, your 253-SMB67-A0 is customized to your exact needs! Let me know if you need recommendations on drill bit sizes for specific cables.