

Distributed audio is one of the largest categories in residential integration, and every in-ceiling or in-wall speaker depends on a cable that gets buried behind drywall for the life of the house. In-wall speaker wire is not the same product as the zip cord that ships with a bookshelf speaker. It must carry an NEC listing for installation inside walls, and it must be sized and planned so the system still works when the client adds a zone three years from now.
This guide focuses on the in-wall side of the job: what the CL2 and CL3 ratings actually mean, which one to stock, how to plan home runs and zones before rough-in, and the installation habits that prevent callbacks. For a deeper look at gauge math, shielding, and direct burial audio cable, see our companion guide on choosing audio cable and speaker wire for every install.
Why In-Wall Speaker Wire Has to Be Rated
The National Electrical Code treats amplifier output wiring as a power-limited circuit. Under NFPA 70 Section 640.9(C), the amplifier’s marking tells you which wiring method applies, and most residential amplifiers and receivers are marked for Class 2 or Class 3 wiring. That means the cable run inside the wall must be a listed Class 2 or Class 3 cable, marked on the jacket, and fire-resistant.
Unmarked speaker wire, including the clear or two-tone zip cord sold for connecting speakers in the open, carries no such listing. It can be a perfectly good conductor, but an inspector can’t verify its fire performance once it disappears into a wall. On a new build or a permitted remodel, that is a failed rough-in inspection waiting to happen.
THE IN-WALL RULE If the cable goes inside a wall, ceiling, or floor, it needs a CL2, CL3, or higher-rated listing printed on the jacket. If the listing is not printed on the cable, treat it as not rated. |
CL2 vs. CL3 In-Wall Speaker Wire: What’s the Difference?
CL2 and CL3 are NEC cable types for Class 2 and Class 3 circuits. The practical difference is insulation voltage rating: listed Class 2 cable must be rated for at least 150 volts, and listed Class 3 cable for at least 300 volts. Class 3 circuits can carry higher voltage, so the cable needs more insulation margin.
The substitution rule is what makes the buying decision easy. CL3 cable may be used anywhere CL2 is required, but CL2 may not be used where Class 3 wiring is required. Because you will not always know which amplifier the client installs, or what gets swapped in later, CL3 covers every residential scenario with one product.
CABLE TYPE | WHERE IT CAN GO | NOTES |
|---|---|---|
CL2 / CL3 | General in-wall and in-ceiling runs | CL3 substitutes for CL2—the default for residential in-wall speaker wire. |
CL2R / CL3R | Riser shafts and vertical runs between floors | Also acceptable wherever standard CL2/CL3 is allowed. |
CL2P / CL3P | Plenum spaces used for environmental air | Common in commercial ceilings; rarely needed in homes. |
CL2X / CL3X | Limited-use applications, including dwellings | Restricted locations and sizes; check the NEC before relying on it. |
CMR / CMP | Communications cable ratings | Can substitute for the equivalent Class 2/3 types per the NEC substitution rules. |
Vertical Cable’s 209 Series indoor audio cable carries both CMR and CL3 ratings and is ETL listed, so a single cable covers in-wall runs and riser applications between floors. Stranded oxygen-free copper conductors make it easier to fish through finished walls than solid or stiff constructions.
WHAT TO STOCK For residential work, carry CL3 or CL3R in-wall speaker wire as your standard. It is accepted everywhere CL2 is, handles Class 3 amplifier outputs, and removes the guesswork at rough-in. |
Choosing In-Wall Speaker Wire Gauge
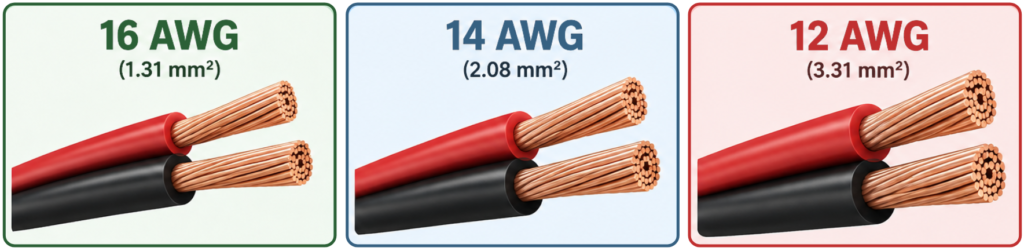
Gauge keeps cable resistance low compared to the speaker’s impedance, so amplifier power reaches the speaker instead of heating the wire. Longer runs and lower-impedance speakers call for heavier wire. For most homes, the decision comes down to three sizes.
SPEAKER IMPEDANCE | 16 AWG | 14 AWG | 12 AWG |
|---|---|---|---|
8 ohm | Up to 50 ft. | Up to 100 ft. | Up to 150 ft. |
4 ohm | Up to 25 ft. | Up to 50 ft. | Up to 100 ft. |
In practice, 16 AWG handles most ceiling speakers in bedrooms, kitchens, and baths where the equipment location is nearby. 14 AWG is the safer choice for home theater surrounds, long runs to the far side of the house, and 4-ohm speakers. Step up to 12 AWG for passive subwoofers, large outdoor zones, and anything pushing those distance limits. When in doubt, go one size heavier: the cost difference is small next to opening a finished ceiling.
Large homes with many speakers on one zone may use a 70-volt distributed system instead, which allows much longer runs on lighter wire. Our audio cable and speaker wire guide includes a full engineering reference for 4-ohm, 8-ohm, and 70-volt runs by loss tolerance.
2-Conductor vs. 4-Conductor Speaker Wire
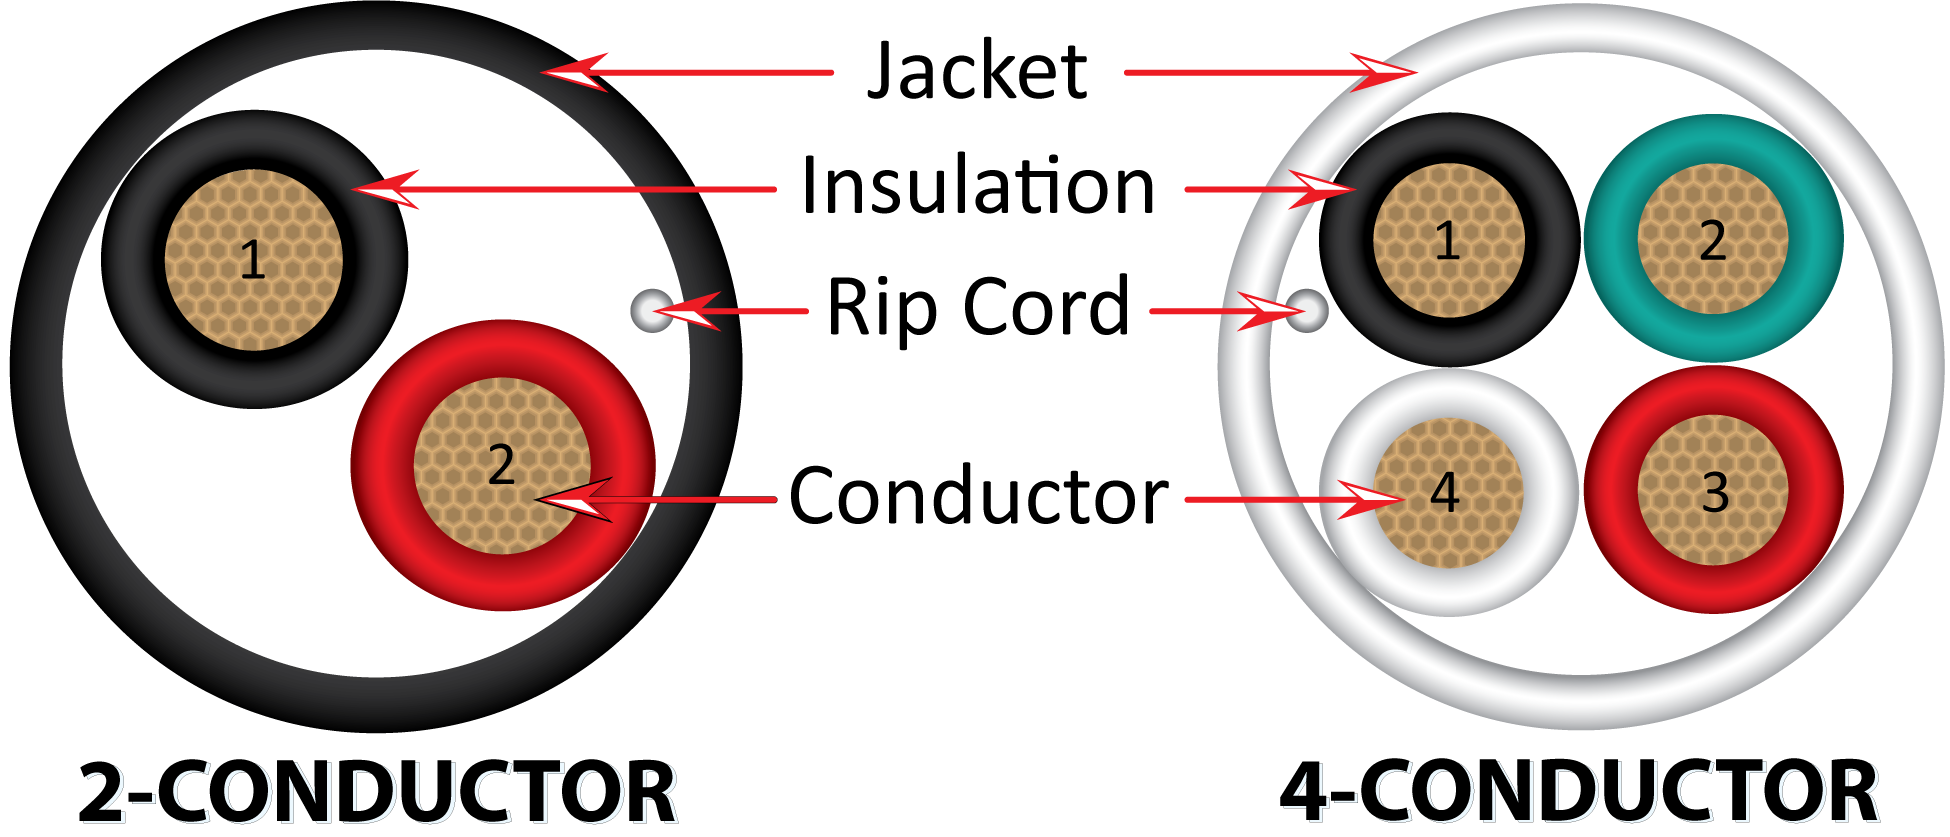
Two-conductor cable (16/2, 14/2) feeds one speaker channel. Four-conductor cable (16/4, 14/4) carries two channels in one jacket, which is useful in three common situations:
- Stereo pairs in one room. Run one 4-conductor cable to the first speaker location, then continue to the second, keeping left and right channels in a single pull.
- Wall-mounted volume controls. A 4-conductor home run to the volume control and a 4-conductor run from the control to the speakers keep a zone’s wiring clean and serviceable.
- Future flexibility. An extra pair gives you room for bi-amping or changing the zone layout later without pulling new cable.
 |
Planning Whole-Home Audio Wiring
The most expensive whole-home audio mistakes happen before you pull a single cable. Settle these decisions with the homeowner and designer before rough-in.
Home Runs to the Equipment LocationHome-run every speaker or zone to a central equipment location, such as a rack, structured wiring panel, or closet. Daisy-chaining speakers from room to room saves cable up front but locks the system into one amplifier layout and makes troubleshooting slow. Home runs let the integrator change amplifiers, add zones, or move to networked streamers without opening walls. | Zones and Volume ControlsDefine zones by how the family actually uses the house, not just by room. Open kitchen and family areas often share one zone; bedrooms and offices usually get their own. If a zone uses in-wall volume controls, confirm the control type early, because impedance-matching controls change how many speakers a single amplifier channel can safely drive. | What to Run Alongside Speaker WireModern audio systems rely on control and network connections as much as speaker cable. At each keypad or control location, pull CAT6 alongside the speaker wire. Run CAT6 to TV and streamer locations, and consider coordinating with lighting control and CL3-rated LED cable runs happening during the same rough-in. For patios and landscape zones, switch to direct burial audio cable once the run leaves the building. |
FUTURE-PROOF EVERY HOME RUN Where walls allow it, add conduit or a pull string from the equipment location to the attic or basement. The next upgrade will need a new cable, and the homeowner will thank you for not needing a drywall contractor to add it. |
Rough-In Tips for In-Wall Speaker Wire
- Leave service loops. Leave a couple of feet of slack at each speaker location and more at the equipment end so terminations can be redone.
- Label both ends. Mark every cable with room, speaker position, and channel (for example, “KIT-L”) before the drywall goes up.
- Keep separation from power. Class 2 and Class 3 cables must be kept out of the same raceways and boxes as line-voltage wiring unless a code-permitted barrier is used. Avoid long parallel runs next to power, and cross at right angles where you must.
- Protect the cable. Use nail plates where cable passes near stud faces, low-voltage mounting brackets at speaker and control locations, and avoid over-tightened staples that crush the jacket.
- Use a distinct jacket color when possible. A speaker wire color that is different from Cat6 and security cable makes the right cable easy to find at trim-out.
- Photograph before drywall. A quick photo of every open wall and ceiling is the cheapest as-built documentation you will ever make.
Industry guidance for residential audio design, including CEDIA RP22, treats cable quality and signal integrity as foundational to system performance. The wiring decisions made at rough-in set the ceiling for everything the integrator can deliver later.
Frequently Asked Questions
Can I use regular speaker wire inside a wall?
Not in a code-compliant install. Wire run inside walls, ceilings, or floors must be listed as CL2, CL3, or a higher-rated type with the rating printed on the jacket. Unmarked zip cord is intended for exposed connections only.
What is the difference between CL2 and CL3 speaker wire?
CL2 cable is listed for Class 2 circuits and rated for at least 150 volts; CL3 is listed for Class 3 circuits and rated for at least 300 volts. CL3 can be used anywhere CL2 is required, so it is the simpler choice for residential speaker wiring.
What gauge speaker wire do I need for in-ceiling speakers?
16 AWG works for most 8-ohm ceiling speakers up to about 50 feet from the amplifier. Use 14 AWG for longer runs, 4-ohm speakers, or home theater channels, and 12 AWG for subwoofers or very long runs.
How do you run speaker wire through walls?
In new construction, pull cable through drilled studs and joists from each speaker location back to the equipment location before drywall. In finished homes, fish cable through the attic or basement using fish tape or rods, enter each wall cavity from above or below, and use low-voltage mounting brackets at the speaker cutouts.
Which speaker wire is positive?
Speaker wire marks polarity with a colored conductor, a printed stripe, or ridges on one side of the insulation. Pick a convention, such as marked conductor to positive, and use it on every speaker and amplifier terminal so all speakers stay in phase.
WIRING A WHOLE-HOME AUDIO PROJECT? Vertical Cable’s 209 Series covers in-wall audio from 10 AWG to 18 AWG in 2- and 4-conductor, shielded and unshielded, indoor and direct burial constructions. Not A Vertical Cable Distributor Yet? Apply For An Account And Our Team Will Get You Set Up. |